I’ve known Bary Yogev—one of Israel’s most talented bakers—mostly from afar. Years ago, when I first started building my sourdough starter at home, I used his recipe to bake my bread and it always came out amazing and super precise.
During the Corona craze for sourdough bread, and my own deep desire to bake, I returned to his recipe. But this time, I actually met with Yogev, and he taught me all the secrets behind his magnificent sourdough. This guide includes everything: how to build a starter from scratch (though you can always “adopt” a starter from a friend to save time, the process of making your own is incredibly satisfying).
Yogev (45) started his baking career after closing his restaurant in 2000. He worked in many Tel Aviv bakeries while devouring English-language literature on baking. Back then, aside from a few names like Erez Komarovsky, there were very few Israeli artisan bread specialists.

“I decided to learn about bread because it’s just flour and water—ingredients we all have. There are no limits in this field; you can create new rules all the time,” he told me while I tasted his bread.
Bary eventually taught at a couple Israeli culinary schools, but the turning point came when he met Jacques Genin, the legendary Parisian pastry chef. Genin tasted Bary’s bread and was impressed; he asked why he hadn’t opened a bakery abroad. A question that continued to resonate with Bary long after their successful meeting.
In 2018, together with partners Yaniv, Ilana and Roni, he opened Liv Breads Bakery in Milburn, New Jersey. “This place is a playground where you can create and make new rules. I don’t make concessions to myself and anything I didn’t know how to make perfectly, I learned how to, like croissants for example.”

All the breads in the bakery are made from 100% sourdough, and you will also find focaccia, breakfast pastries, challah, brioche, cookies and cakes, and Danish. The sandwiches are made with the homemade breads, of course, and there are salads, and excellent coffee.
When I ask him how the bakery got through the coronavirus, Yogev reinforces what seemed to be a similar trend here in Israel: “After Corona, bread gained momentum, up until then, pastry was in first place, but now bread has taken the big stage.”
I can also give the seal of approval for Yogev’s bread as I tasted his bread, along with butter and a little salt. It’s so good even Whole Foods decided to carry his bread.
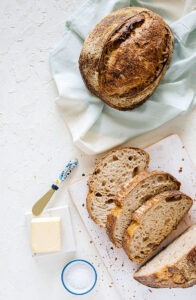
And now, you’ll want to make it too. Because there’s nothing more satisfying than homemade sourdough bread. The kind that’s full of bubbles on the inside with a ridiculous crust on the outside.
You may be asking at this point what exactly Sourdough is. It’s a culture of wild yeasts (yeast found in the air, the flour, and even on fruit). Instead of store-bought yeast, we create a “starter” that leavens the bread giving it the deep sourdough flavor. The age of the starter—as well as the flour used to feed it—greatly affect the taste and texture of the bread, and because it is a slower, more moderate rise, many claim sourdough breads don’t make them bloated like breads that use regular yeast, which are more intense and stronger.
And there’s even a video! How to build your starter at home:
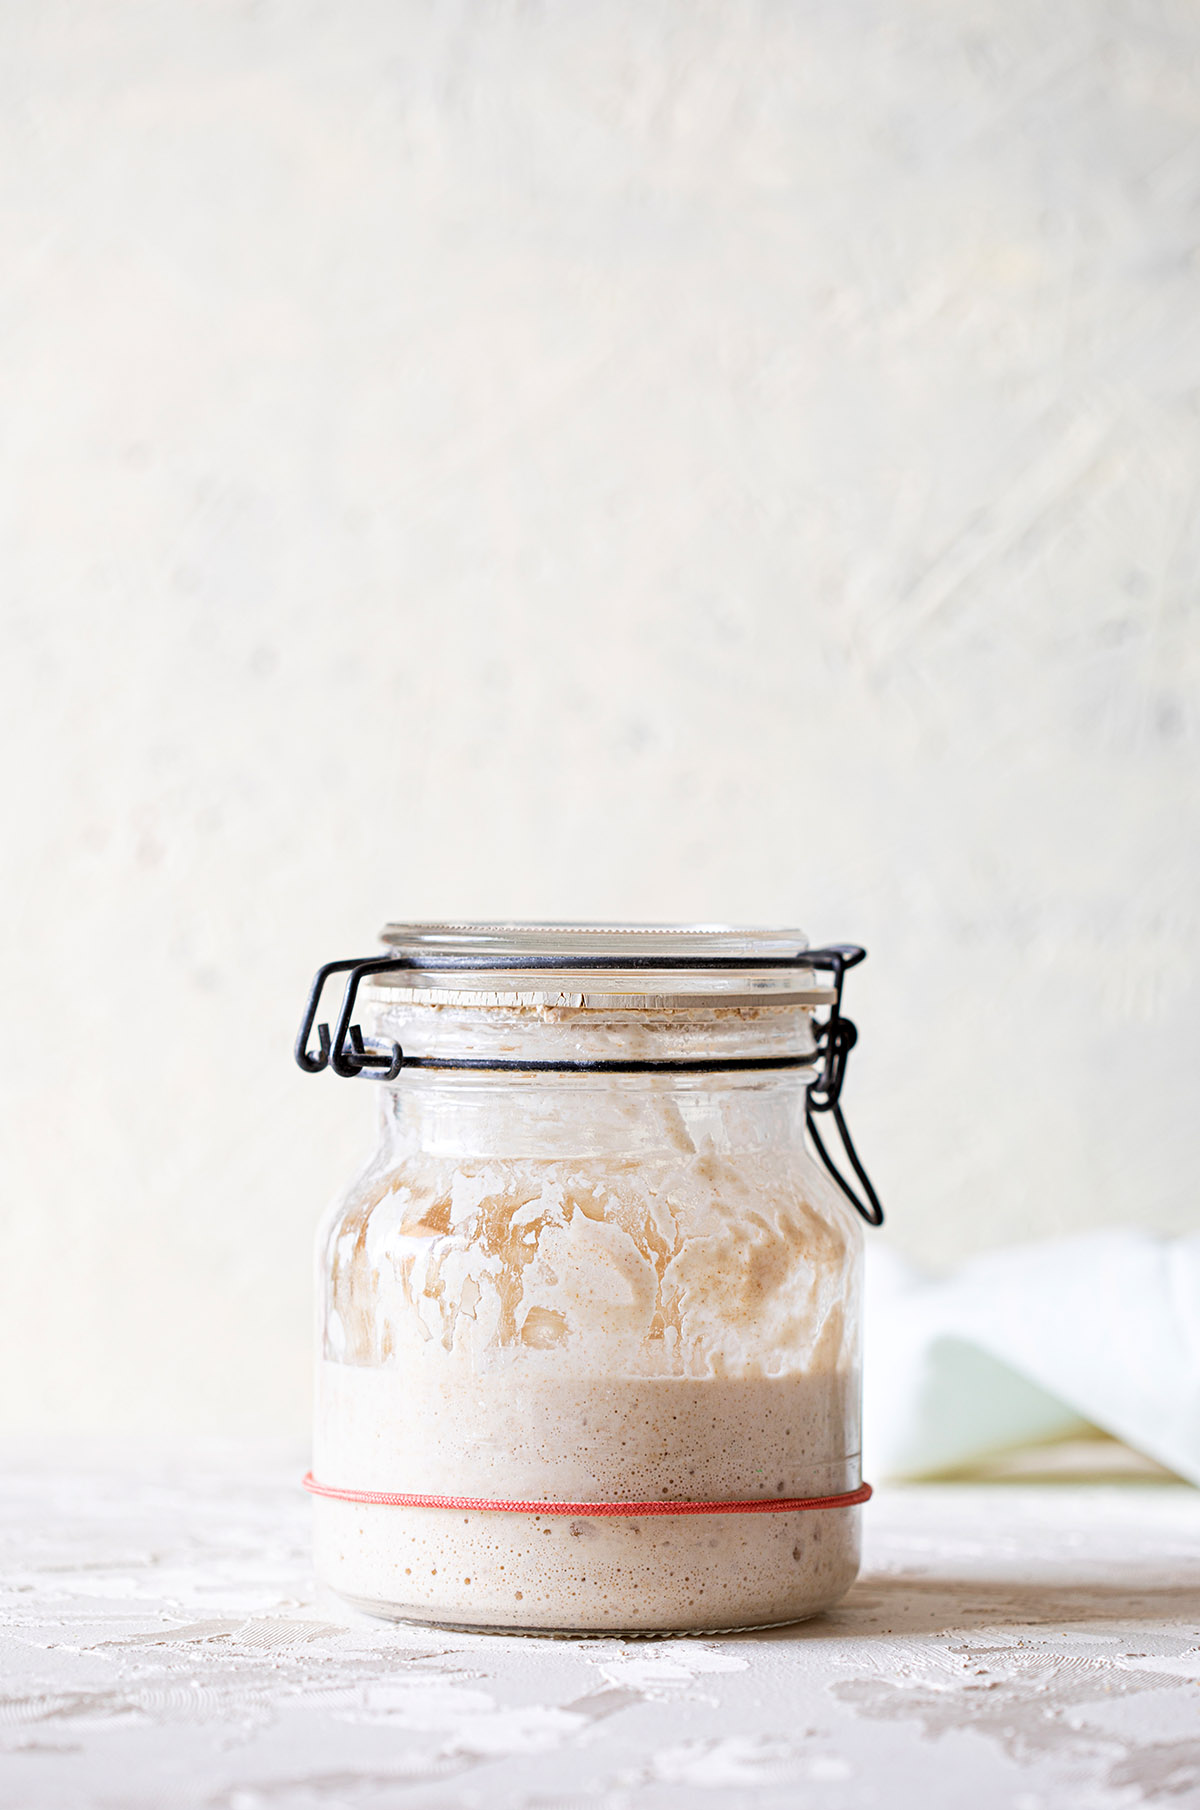
How to Grow a Starter (The 5-Day Journey)
Note: You will need a glass jar and a kitchen scale that has grams, while you might not use the metric system, grams are the standard for bread-making and any baker worth their salt will write their recipe using them. For this reason, this recipe will utilize grams only.
Day 1:
– Pour 20 grams of water into a glass jar and add 10 grams of white flour and 10 grams of whole rye flour. Mix well.
– Cover with a lid and let the dough rest for 12 hours at room temperature and another 12 hours in the refrigerator.
Day 2:
– In the same jar, pour in 20 grams of warm water and mix until combined.
– Add 10 grams of white flour and an equal amount of whole rye flour and mix until the flour is incorporated.
– Cover with a lid and let the dough rest for 12 hours at room temperature and another 12 hours in the refrigerator.
Day 3:
At this point you can start to see small bubbles.
– Pour 20 grams of warm water into the jar and mix well.
– Add 10 grams of white flour and 10 grams of whole rye flour and mix until incorporated.
– Cover with a lid and let the dough rest for 12 hours at room temperature and another 12 hours in the refrigerator.
Day 4:
At this point, the starter has a slight sour smell reminiscent of yogurt.
– Pour 40 grams of cool water into the jar, not from the refrigerator (note that the amount of water varies) and mix well.
– Add 20 grams of white flour and 20 grams of whole rye flour (the amount also varies here) and mix until the flour is incorporated.
– Cover with a lid and let the dough rest for 12 hours at room temperature and another 12 hours in the refrigerator.
Day 5:
At this point, the starter will swell and bubbles will appear, which proves that is alive.
– Pour 40 grams of cool water into the jar, but not from the refrigerator, and mix well.
– Add 20 grams of white flour and 20 grams of whole rye flour (and mix until completely incorporated.
– Cover with a lid and let the dough rest for 12 hours at room temperature and another 12 hours in the refrigerator.
Congratulations! You are now a parent to a sourdough starter. So what do you do now?
If you bake once a week, keep the starter in a jar in the refrigerator and feed it once a week. If you bake every day, keep it at room temperature and feed it every day. The rule of thumb is this: warmer temperatures require more feedings and cold temperatures require fewer feedings.
Please note – even if you decide not to make bread that week, you still need to dispose of some of your starter and feed it with flour and water.
So how do you feed it?
– Weigh 100 grams of starter in a bowl and add 100 grams of water. Mix well.
– Add 100 grams of flour and mix until incorporated. Place in a clean jar and seal.
– The remaining starter (remember? We used only 100 grams here) you can use to make breads, pastries, and the like.
– Repeat every week or every day depending on how much bread you’re making and how hot the ambient temperature is.
Important tips
– You can use half white flour and half rye and play around a bit with the flours, such as spelt flour or whole wheat.
– How do you know that the starter is ready for baking? It should have doubled in volume. And how do you know that it has? After feeding it and returning it to a clean jar, put a rubber band around the jar at the level of the starter. This will be your beginning height. Now place it in the refrigerator or to rest at room temperature. Once the starter has doubled in volume, it should be fed and it is ready for work.
– Want to measure water temperature accurately? Watch the video.